Please note, the version of Guitar Hero 3 I have is the Wii version, but I believe all Guitar Hero controllers are essentially the same. The original GH1 and GH2 controllers are identical, save for more screws on the body, but the internals are the same.
Taking your Guitar Hero 3 Les Paul is really simple, but I can understand that not everyone is an idiot and wants to risk a £70/$90 piece of kit without prior knowledge.
So, if you're having problems with your buttons, check out my simple guide to dismantling and cleaning your Les Paul.
STEP 1.
First of all, you will need the following:
1. Spare roll of kitchen roll (or cleaning rag of your choice)
2. Small X-head screwdriver
3. A 2mm hex-head screwdriver bit (or a 2mm hex key/allen key works just fine)
4. The neck part of your guitar.

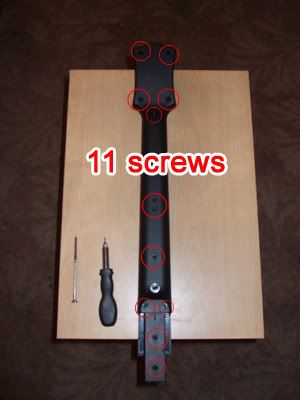
STEP 2.
Using the hex key, remove all 11 screws on the underside of your guitar neck. You do NOT need to remove the one on the spare strap bobble thing.
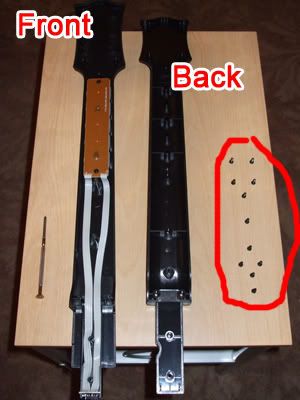
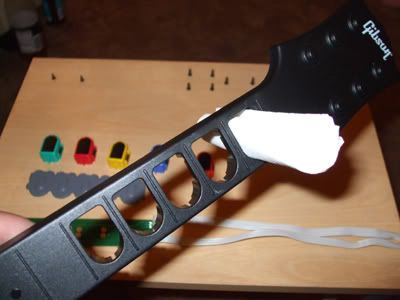
STEP 3.
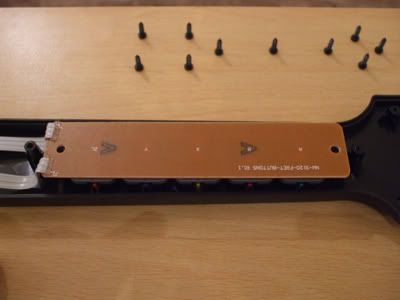
If you're like me, you'll want to keep all the screws laid out in the same "position" as they need to go back in, but they're all the same size so there's no real need. Anyway, once they're all out, simply remove the back and you'll see this:
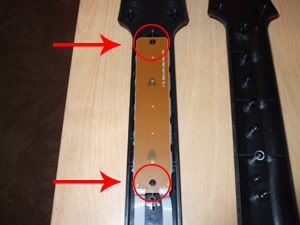
STEP 4.
Using the small X-head screwdriver, remove the 2 screws holding the PCB (printed circuit board) down. When removing this section, you'll want to remove the small connectors at the bottom, but these slide out easy.
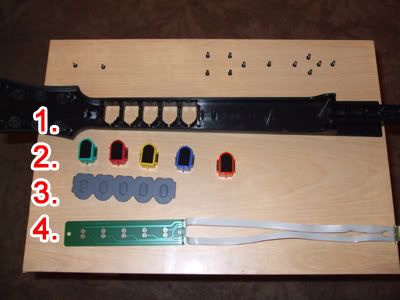
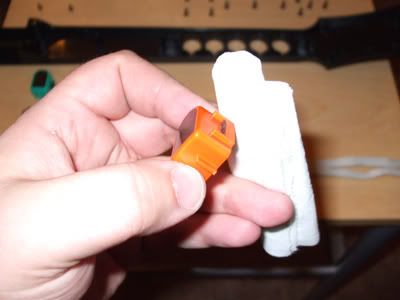
STEP 5.
You now have the following parts that require cleaning.
1. The neck itself
2. The buttons
3. The rubber pads
4. The PCB
STEP 6.
Using your cleaning rag, remove all the grime (its actually dead skin - nice, eh?) and other debris from the inside of the button holes.
STEP 7.
Next clean all around the sides of the buttons.
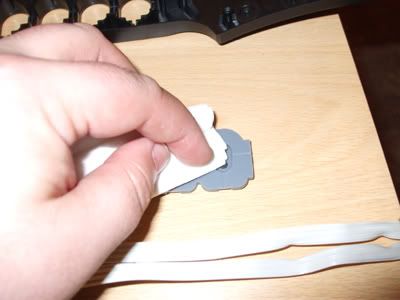
STEP 8.
Dab down the 2 black pads on each of the connectors.
STEP 9.
Finally, *gently* clean off the PCB.

STEP 10.
Place the buttons back in the holes. Make sure you put them back in the right order!

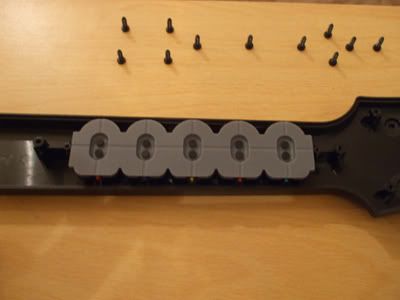
STEP 11.
Place the rubber section over the top of the buttons with the black pads facing you. You should see it fits back snugly over the edges of the buttons.
STEP 12.
Place the PCB back over the top, making sure the 2 holes fit over the screw holes, and then screw it back on.
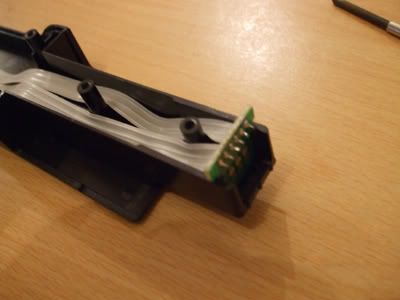
STEP 13.
Place the end section back in the slot, and place the flat cable back where they belong.
STEP 14.
Now, all that's left is to put the back of the neck back on, screw it in place, and that's it! Job = done.

Now that your Les Paul has been cleaned, it should have improved performance and should no longer stick, but it won't help you beat Lou on hard any.
Happy cleaning!

 Guitar Hero controller maintenance
