As many of you may know, the PS3 is a highly versatile and customisable machine. From wallpapers to the actual layout of the main menu, you can change almost every part or feature.
One of the most important parts of the PS3 is the hard drive, and yes, this too is fully replaceable, as it is simply a standard SATA laptop-size hard drive, and best of all, changing the drive will not invalidate the warranty!
However, a recent experience has shown us that there are two variations of the hardware, which requires a little bit more work, but will result in the same outcome - increased hard drive space.
Here we will show you how to change the hard drive in your PS3.
Here's a list of the things you will need:
- A PlayStation 3 machine hooked up to a TV
- A small cross-head screwdriver
- An external USB hard drive AT LEAST as big as your PS3 hard drive
- A PC with internet connection
- A new hard drive (the one we used for this experiment (and the most perfect drive spec-wise) can be found by clicking this link here.
The specs you should be aiming to match are:
- 2.5" Hard Drive
- SATA150
- 5400rpm
- 8MB Cache
The PS3 will only supply enough power to speed a drive up to 5400RPM, so getting a 7200RPM drive is a waste of time.
Before you start taking the PS3 apart, you will need to back up all of your data, unless you want to lose all your save data and your trophies. To do this, plug in the external USB drive.
Once its active, go to SYSTEM SETTINGS, then BACKUP UTILITY, then BACKUP. You will then get the following screen.

Select YES, and the PS3 will start transferring all of your data to the external hard drive. Ignore what it says at the start. It will NOT take 400 minutes to back up. Once it hits around 2% or 3%, it will level out. The average time for backup is around 20-30 minutes. Go make a sandwich. Have a drink. Whatever.
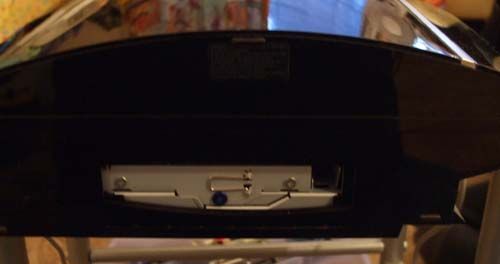
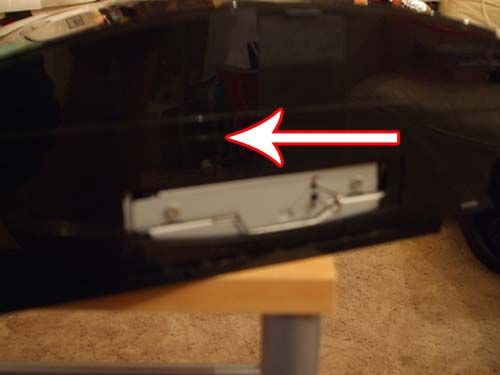
Once backup is complete, shut everything down and unplug the PS3. Set it on a firm table and turn it to face this panel.

Its kinda hard to see in that picture, but there is a small hatch on the lower half. Using a thumbnail, prise this panel off to remove the hard drive.
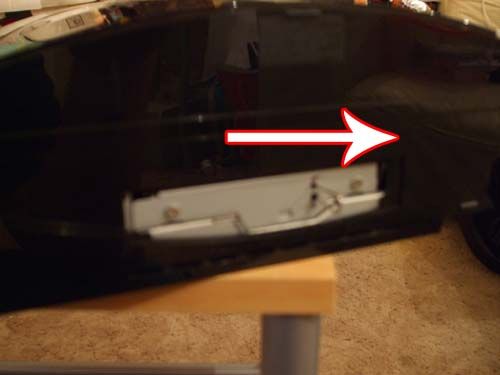
Now, you will see one of two types of drive, pictured below. The first one is the older model of the PS3, and the second is the newer version of the PS3.
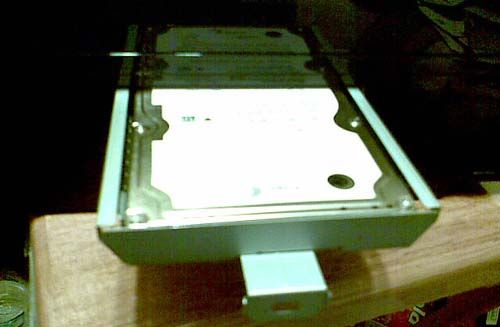
As you can see, the older drive has a little handle that pops out to allow you to pull the drive out, whereas the newer model simply slides out. If you have the older model, pull out the handle and slide to the right to unhook the drive.
Once you have the hard drive in your hand, simply unscrew the screws that secure it to the bracket, then fit the new drive into the bracket and secure.
Inserting the drive is the opposite of removing it, obviously. With the newer model, simply slide it in and secure. In the older model, slide the drive in and using the tab, slide to the left to secure it.
When you turn the PS3 back on, one of two things will happen.
1. When you switch on, you will be prompted to format your new hard drive. Do so, and then your PS3 will reboot normally. Then, with the USB external still connected, go to SYSTEM SETTINGS, then BACKUP FACILITY, select RESTORE, and then just follow the onscreen prompts. Once that's completed, your new high-capacity PS3 is now ready for use, with every single bit of data intact.
2. When you switch on, you get the following error message.

First of all, DON'T PANIC. This does not mean all that messing about was for nothing! All this means is that your PS3 requires an update, which is a doddle.
Simply remove the external hard drive and connect it to your PC. Open using "My Computer", and create a folder called PS3. Inside that folder, create a new folder called UPDATE. **NOTE** The names MUST be in capitals for your PS3 to recognise it.
Then, using your PC, download the latest PS3 firmware update from THE OFFICIAL UK SITE or alternatively THE OFFICIAL NORTH AMERICAN SITE and save it into the UPDATE folder. Hook it back up to your PS3, boot it up, and follow the onscreen prompts. Eventually your PS3 will be fully restored to its former glory, with the added bonus of a larger hard drive.
And that, ladles and jellyspoons, is that!
***WARNING***
When you first switch your PS3 on with the new hard drive and before you restore your data, you may be tempted to see if your trophies were saved too. Word of advice - DON'T! Just restore your data THEN check them out. If you do check them before, there's a chance it will bring back a result of zero trophies, which can lead to the onset of crying, stomping of feet, and throwing of joypads.
However, all is not lost. To get them all back, continue with the data restore process, and when the upgrade is fully complete, just choose one game you have trophies on and obtain at least one trophy. This will "kickstart" the trophy system into remembering what you had, and ALL trophies will be restored for every single game you have. I made this mistake, and I almost died.
So don't check your trophies until the upgrade is fully complete. You have been warned.

 Upgrade your PS3 hard drive
